Hatch cover fix or replacement

Krystindee
Posts: 4
Joined: Tue Dec 13, 2016 2:07 am

Hatch cover fix or replacement

Post by Krystindee »

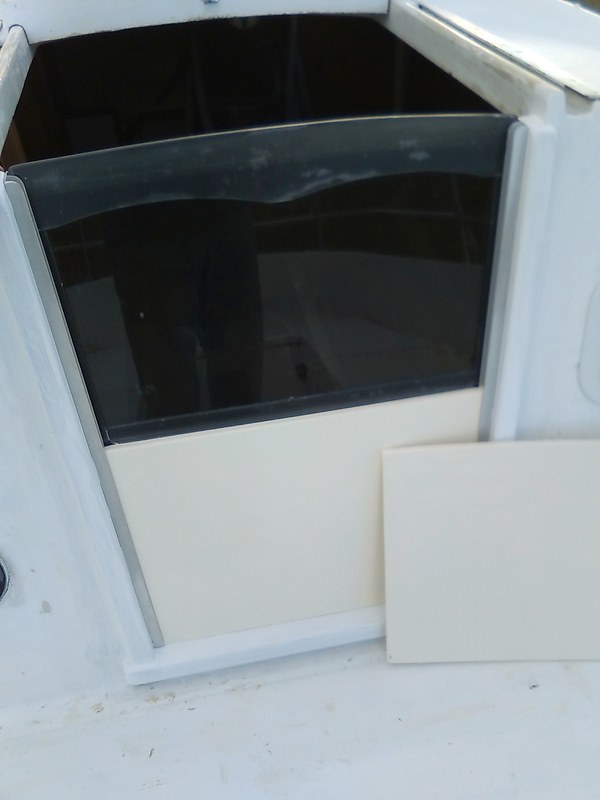
Hi everyone. I'm a new (old) Ballad owner. I just picked up a 1973 Ballad which currently resides in the Pacific Northwest. Mine has a severe yellowing and what appears to be some deterioration of the hatch cover (over the V-berth). I've seen this in a number of pictures on other boats. It seems a little flimsy so I'm concerned about it cracking if stepped on. Any suggestions on how to clean this or fix it up a bit ? Has anyone replaced this before ?
I attached a pic ;)

Thanks in advance for your input.
Attachments
1674671L.jpg
1674671L.jpg (311.27 KiB) Viewed 45753 times
User avatar
prjacobs
Posts: 235
Joined: Fri Oct 12, 2012 4:06 pm

Re: Hatch cover fix or replacement

Post by prjacobs »

Hi,
Welcome to the Ballad Forum!
I've seen a lot of hatches like this (mine included). I used to worry about it, but it's served well for the three years we've been sailing our Ballad. I considered making a new hatch, but I like the light that shines through into the V-berth so have left it under the heading "future projects".
I'm in your area, Pedder Bay 12 miles west of Victoria BC on Vancouver Island.
Cheers,
Peter.
PS I see your traveller is mounted over the cabin top. How does that work for you?
Krystindee
Posts: 4
Joined: Tue Dec 13, 2016 2:07 am

Re: Hatch cover fix or replacement

Post by Krystindee »

Hey Peter! Thanks for responding. Honestly, I just got the boat last week and have been making my list of the good, bad and ugly. Luckily the good this time far outweighs the bad :) (last boat was a bit of a massive project). I've used travelers mounted like this on other boats, and like it just fine. I have to play with this one a bit to see how it feels. There are 2 lines to pull the car from one side to the other, I'm thinking of just making one. That's how the others were set up. My last boat was mounted just under the companionway which I think is common on these boats too. That was good, but kind of got in the way.

I'm not in a major rush either on the hatch cover, but have some ideas floating around in my head. I too like the light that comes through. I'm almost thinking of glassing it all over then adding a fairly flush, thicker piece of clear glass on top. We'll see. :)

Krystin
Bob McGovern
Posts: 288
Joined: Fri Oct 26, 2012 3:08 am
Location: Wyoming, USA

Re: Hatch cover fix or replacement

Post by Bob McGovern »

Hi Krystin. That translucent hatch style was fashionable in the 70s. It's basically just standard chopper gun polyester layup with the gel coat left off the central part. Hence the nicotine yellow color, and also a certain amount of crispiness due to UV getting at the resins. Ours was painted over at some point.

Plexifix of Denmark sells/sold a replacement hatch with smoked lens:

http://www.plexifix.dk/ALBIN-BALLAD.htm

It might be possible to find a local shop that can bend aluminum extrusion & weld you a custom replacement. Our plan (for now) is to build up the existing hatch from underneath with biaxial tape to make it thicker and stiffer, then cut out the middle and put an acrylic lens in it. Maybe some non-skid tape to make it safe to step on? Or we might just make a 'splash mold' off the current hatch & build a whole new frame in that. We're also kicking around the idea of making it hinge both directions, tho I'm not sure the benefits are worth the effort.

A few Ballad owners have also replaced the curved hatch with a flat deck section & stock production hatch, like a Bowmar. A light-transmitting dorade or mushroom vent in the middle could also brighten up the V-berth and add some airflow, even with the hatch dogged shut. I have a feeling sailing or motoring with the front hatch open could result in massive downflooding if you stuff the bows into a wave or ferry wake! :o
Krystindee
Posts: 4
Joined: Tue Dec 13, 2016 2:07 am

Re: Hatch cover fix or replacement

Post by Krystindee »

Thanks Bob.
Yeah, sailing on rough days with the hatch open could result in soggy sleeping quarters later on. Ha. Thanks for the info / input on the cover. I like the look of the one you shared in the link. So yes, something like that! :) I'll keep digging to see if I can find something similar around here that is ready to go. Or, I know a fabricator as well so he might be able to build a frame for me to seal some tinted plexi into. And yes, I think at a minimum I need to reinforce the hatch as you mentioned. At least I could do that on a rainy day from inside the boat. Hmm. I guess I'll get a big red "DO NOT STEP HERE" sticker until I strengthen the thing :) It's pretty squishy right now.

Krystin
Bob McGovern
Posts: 288
Joined: Fri Oct 26, 2012 3:08 am
Location: Wyoming, USA

Re: Hatch cover fix or replacement

Post by Bob McGovern »

So progress has been made on the foredeck hatch. There is still some hardware to attach & final cleanup & paint, but in case anyone is contemplating this job, here is what I did with our hatch.

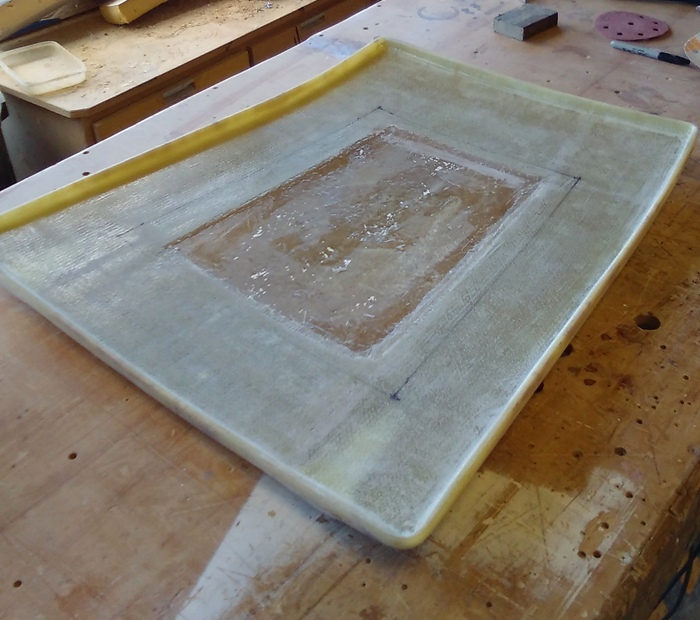
I started by laying up some reinforcement on the back: two layers of butted 1708 biaxial tape (with sewn mat), 7" (18cm) wide, using epoxy resin. Seams were alternated to maximize strength. 45 degree biax adds lots of stiffness, strength, and creates a thicker layup to accept heavy plexiglass. The hinge recesses were filled solid with thickened epoxy.
Imagebiax by Robert Mcgovern, on Flickr

Then I flipped the hatch over, ground off the texture, and draped the whole top surface with one layer of 10oz cloth. This is mostly to create a nice surface. Our hatch had a number of voids or bubbles around the rim, which needed filling before the 10oz cloth was laid.

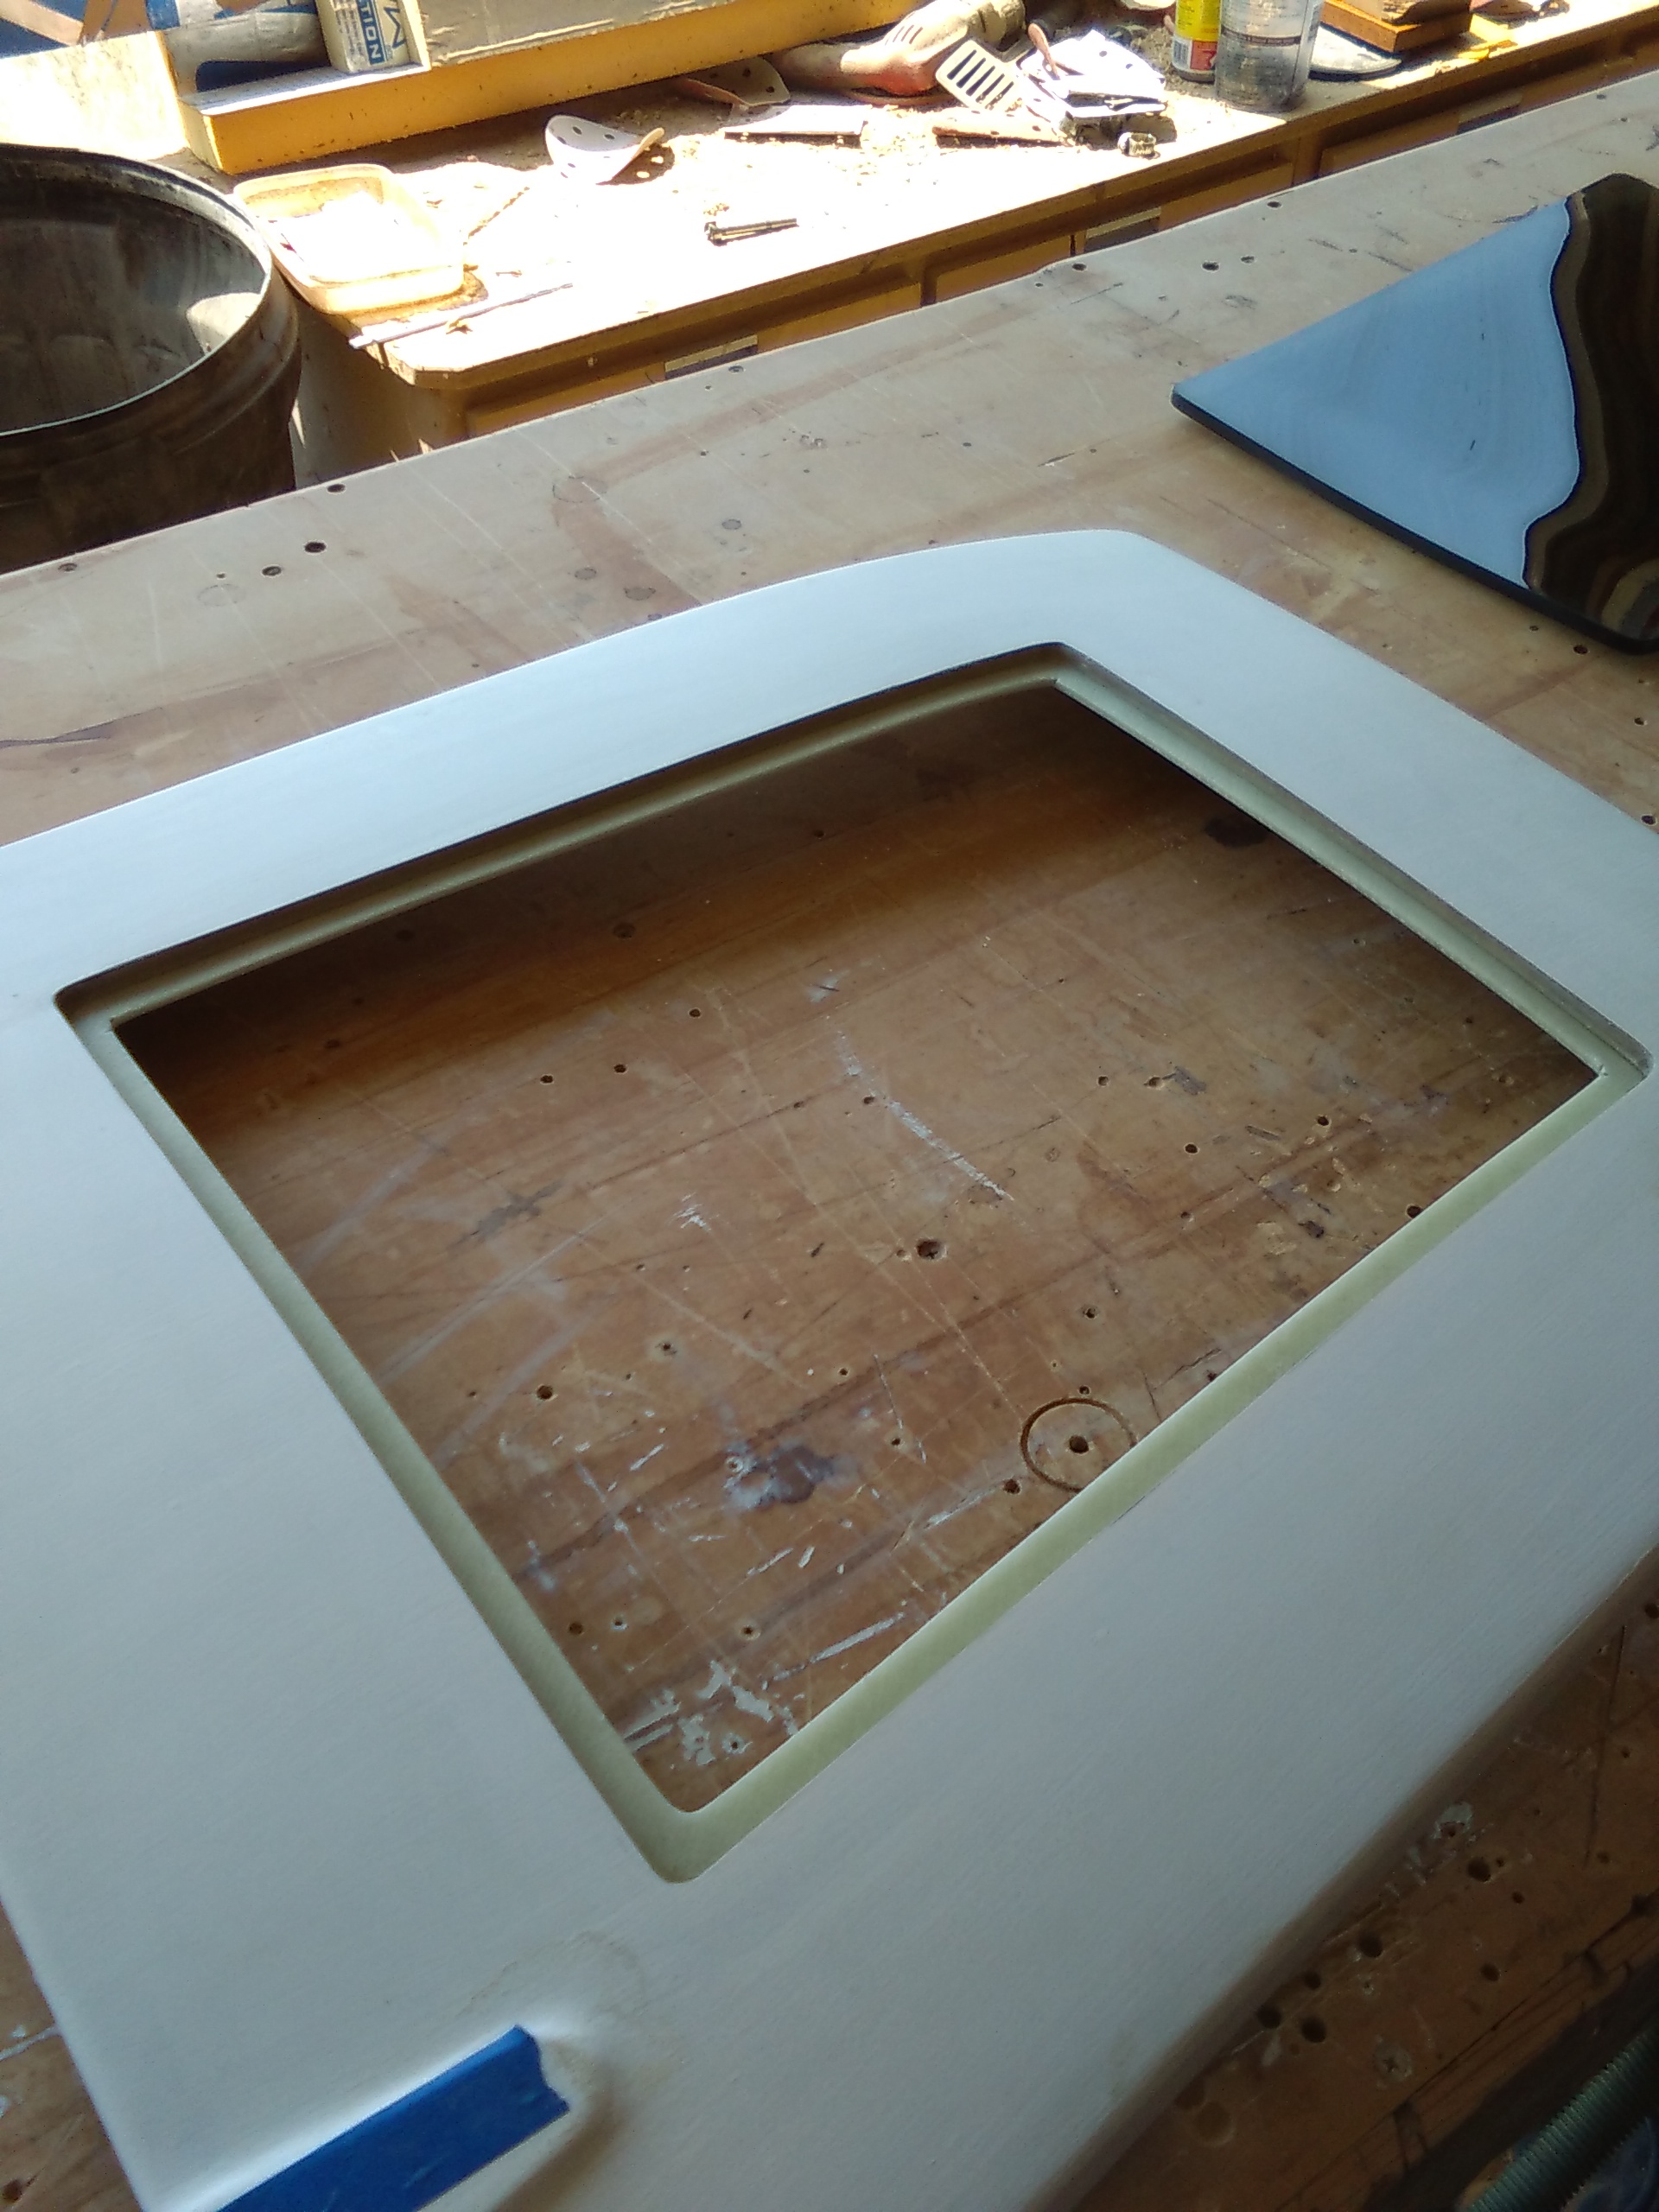
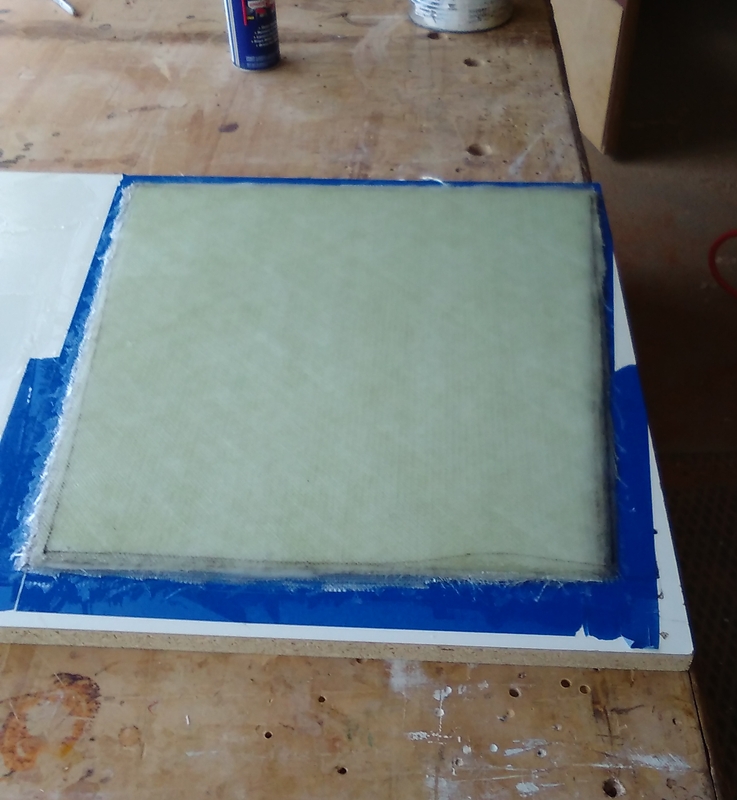
Next, I made a slab of 'G10' about 5mm thick: four layers of 1208 biaxial cloth with one layer of 10oz fabric on both faces, all laid up in one go.
Imageg10 by Robert Mcgovern, on Flickr

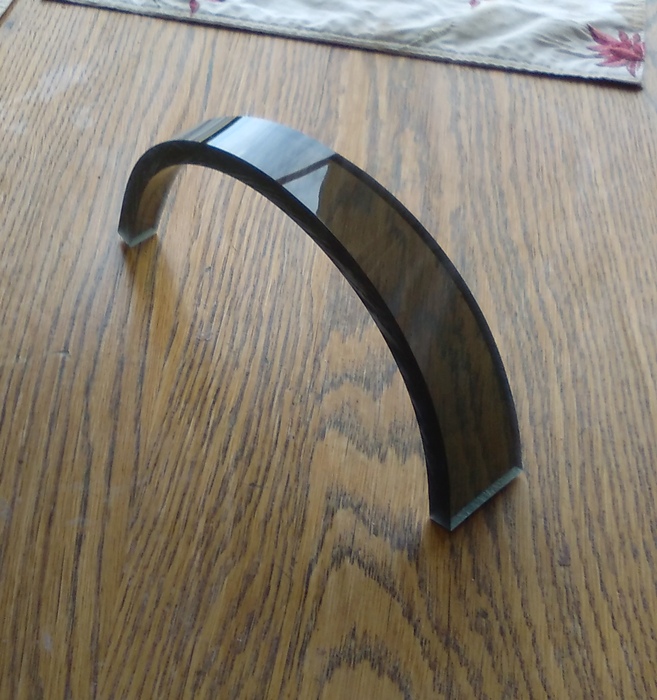
When trimmed, the outside dimensions are about 6cm larger than the intended acrylic lens on both axes. I bought some medium grey 'smoked' acrylic ~3/8" (9mm) thick and cut it to the trapezoidal shape, leaving about 5-5.5" (13cm) of FRP all around. We probably could have removed more FRP than we did, for even more light, but I wanted the hatch to be stiff and strong. It is a big hatch, and prone to twisting! Since the Ballad hatch is curved in both directions, and because you can't really flex 9mm acrylic that much, I had to thermoform it. This is easier than it sounds: just remove the protective film from the acrylic and heat it slowly to 310-325F (163C), and it will form to any shape you like:
Imagebend by Robert Mcgovern, on Flickr

I used the cleaned-up hatch itself as the mold, with soft cotton cloth (felt is better!) under and above the lens. Line up the hot acrylic in the right place, cover with blanket, and clamp it lightly for an hour, until it cools. You will get some springback, but not too much.

Now, using the bent lens as a pattern, I traced and cut out the hole in the hatch itself. Cut the hatch hole ~2mm larger than the lens all around, for thermal expansion. Then I cut out the middle of the G10 slab, such that about 1" (2.5cm) was glue surface and 1.5cm projected into the cutout, to create a ledge for the acrylic to rest on.
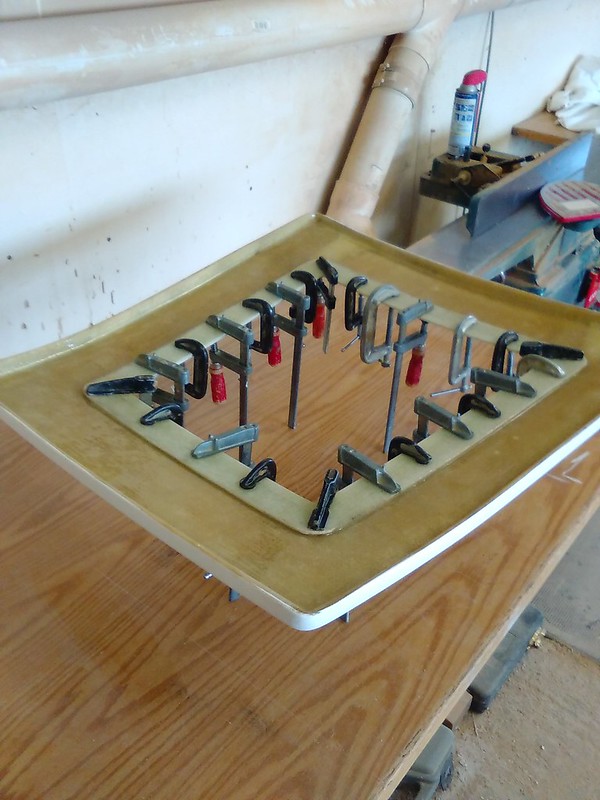
ImageKIMG0204 by Robert Mcgovern, on Flickr

ImageKIMG0206 by Robert Mcgovern, on Flickr

This G10 ledger was epoxied to the back. You could use silicone adhesive to mount the lens, but I decided to use VHB tape from 3M, which was created for structural glazing and is very, very strong. Advantages of tape over goop is no squeezeout mess, and instant bond, with no clamping time. You can put the hatch into service immediately.
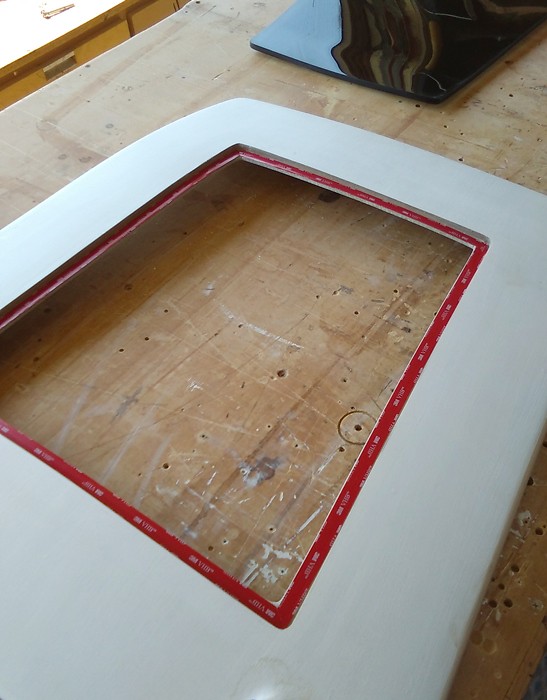
ImageKIMG0207 by Robert Mcgovern, on Flickr

Then I pumped the expansion gap full of black Dow 795 silicone glazing sealant, and immediately peeled the blue masking tape off, leaving a fairly neat caulk line:
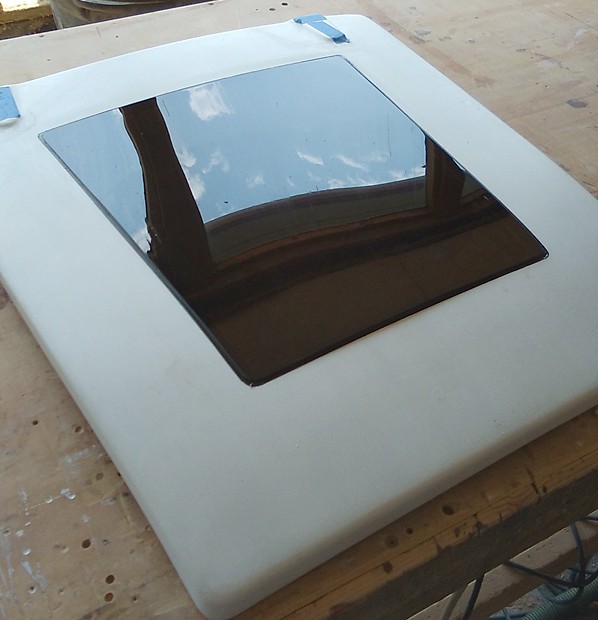
Imagelens in by Robert Mcgovern, on Flickr

The hatch is ready to go! Total cost for this job was perhaps $110 USD, though I still need to purchase some friction supports and new gasket material. I bought extra acrylic and used it to make new companionway hatch boards.
jocke76
Posts: 11
Joined: Tue Sep 20, 2016 4:37 pm
Location: Västerås, Sweden

Re: Hatch cover fix or replacement

Post by jocke76 »

Great work!

Did the thickness of the acrylic fit for the companionway hatches or did you add some spacers?
My hatches need to be replaced soon as they have a lot of ugly cracks. There is some spacing attached to them now and I would like to skip those since they are prone to break if not handled carefully.
Albin Ballad 211, Västerås Sweden
User avatar
prjacobs
Posts: 235
Joined: Fri Oct 12, 2012 4:06 pm

Re: Hatch cover fix or replacement

Post by prjacobs »

Superb job Bob, design and construction. ... I now have a severe case of "hatch envy" !!!
Bob McGovern
Posts: 288
Joined: Fri Oct 26, 2012 3:08 am
Location: Wyoming, USA

Re: Hatch cover fix or replacement

Post by Bob McGovern »

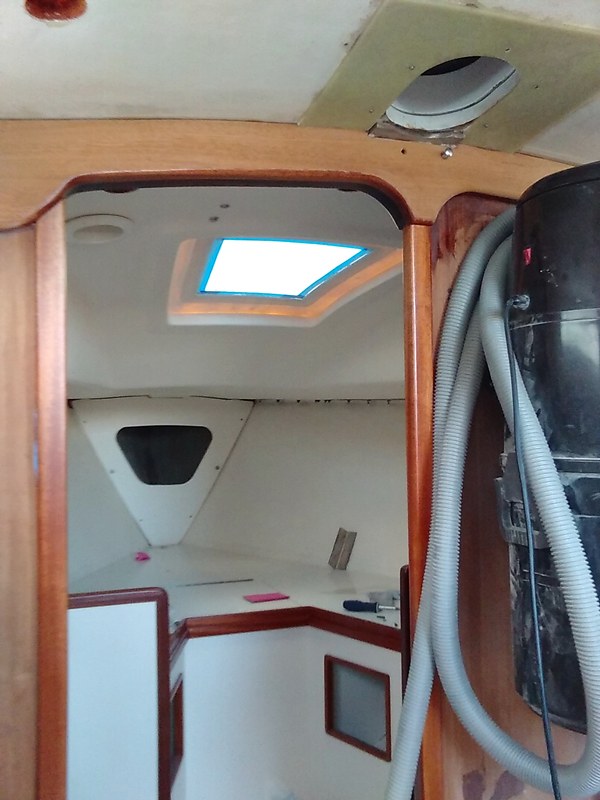
Peter: Thanks. Even with a medium smoked acrylic, it makes a tremendous difference in the V-berth's livability:
Imagebright by Robert Mcgovern, on Flickr

Still waiting for its final interior paint, which is why it remains translucent around the lens.

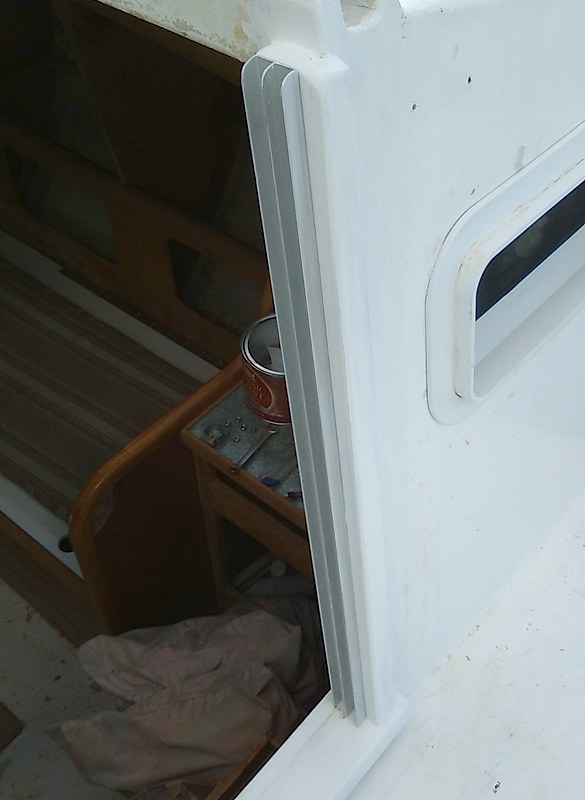
Jocke: I completely ripped out the rotting mahogany surrounding the companionway, gouged out the bulkhead foam & filled gap with epoxy , and epoxied & taped in a bunch of 1"t phenolic (I have many leftover scraps of countertop material). Then I attached some double aluminum channel salvaged from an old medicine cabinet with sliding mirrors:

Imagetracks by Robert Mcgovern, on Flickr

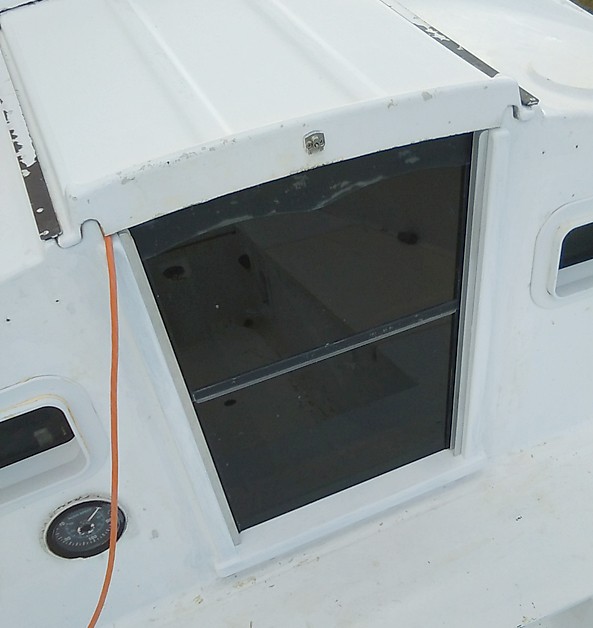
The channel is 1/2" (12mm), so I went to a local glass store, which had a bunch of scrap 1/8" clear plexiglass/acrylic lying around. I glued strips of this to the 3/8" acrylic to improve the fit. The glue I bought was too thin, tho, and I got some unsightly voids, which I may obscure by scuffing up the clear acrylic:

Imagedrops by Robert Mcgovern, on Flickr

It would be easier to use 1/2"t acrylic from the start. One nice feature of a double channel for your drop boards is the options it gives you: you can put both boards in either groove; or put the lower board in the inner groove & upper board in the outer groove, creating an air gap; or put in an insect screen with one or both hatch boards in place; or in horrendous following seas, add a second layer of defense via solid drop boards in front of the acrylic:

Imagetwodrop by Robert Mcgovern, on Flickr

These will also protect the Plexi from UV and wind-blown sand, since we will be dry-storing the boat in the Sonoran Desert.

ETA: I didn't waste the G10 from the inside of the ledger ring! Our mast collar was really neglected and the core all broken down, so I replaced the core two years ago with partners of solid phenolic. But the inner skin was still damaged, and I want a strong backing plate to support turning blocks around the mast, so that's the greenish-looking material you see around the mast opening in the first photo. The G10 oval cut out of that got used under the fore-deck cleat. :lol:
User avatar
prjacobs
Posts: 235
Joined: Fri Oct 12, 2012 4:06 pm

Re: Hatch cover fix or replacement

Post by prjacobs »

Bob,
Nice recess in the beam over the entrance to the head/closet area. I may revisit mine with the band saw as my poor old noggin is taking a beating on the nice piece of sapele I installed there!
Attachments
Beam.jpeg
Beam.jpeg (25.89 KiB) Viewed 45199 times
Post Reply